
A level, stacked cake. It's nirvana. At least the first time for me was. And it's actually easier to do than I originally thought. The hard part is making sure that your individual cakes are level, and that's easy enough to do (I always use a cake leveler).


First thing you need to do is make your cake boards. They should be exactly the size of the cake you plan to put on it (I know...that really should go without saying). The next thing that is important to have is FOOD SAFE foil. Wilton makes this stuff, they call it Fancifoil. I once bought some foil at a cake store that was red and pretty...it was not food safe. When I was icing the cake, the red stuff was coming off. Not good. If you are going to put food on it, just make sure the words "food safe" are on the label. If not, just keep looking....
Next, cover the board. It's pretty easy. Slap some glue on the edges (a glue stick works the best), fold the foil over the edge, and trim the excess. If the bottom of the board is not going to be touching any food, then you can stop there. If the bottom is going to be touching food, then you might want to cut some foil to cover the bottom. There's a picture below to better illustrate.


So, now you have your boards. You build your cakes on your boards (level, fill, ice, decorate) and then gather the next set of tools: food safe dowl rods, a dedicated pencil sharpener (by dedicated I mean that you don't use it to sharpen pencils), and something to cut the dowl rods with. Lucky for me, Husband owns a dremel tool. A word on food safe dowl rods: the ones at the home improvement store are usually treated with a weather proofing chemical, buy your dowls from the cake section at your local craft store or at a cake supply shop. There is also the option of using straws. I've yet to try that. I get too nervous with my cakes to trust an easily bendable plastic straw....
All dowls, when cut, should be the same length. How do you determine the length? Look at your cake and find the side that is the highest, place a dowl into the cake, mark the dowl and then cut all of your dowls. For most of the cakes that I make, I generally only use four dowls for each supporting tier, the top tier never needs to be dowled unless you plan to travel with it fully assembled. If that is the case, then you will take one long dowl, sharpen the bottom, and then insert the dowl into the cake and use a small rubber mallot (or a hammer if that's all you have) to help you get that dowl through all of the cakes and cake boards. Again, something I've never done because I prefer to assemble my cakes on sight so I don't have to worry about covering for a dowl hole in the top most cake tier.

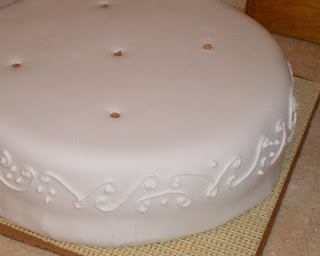
This wedding cake (for my friend Sarah R.) is chocolate, filled and iced with American buttercream, and covered in fondant. The scroll work is done with royal icing.


