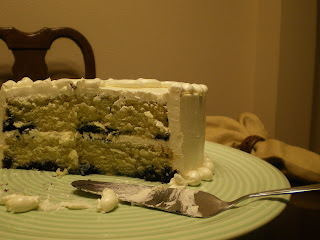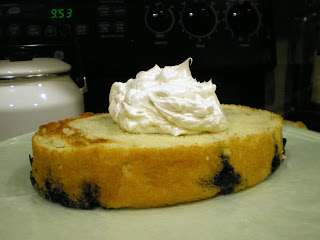
Now, don't get me wrong, I like a crooked cake just as much as you do. I like how how cute and homemade looking they are....but there's nothing more annoying than a crooked cake when you're attempting to build a level cake. Plus, it's pretty important to have level cakes when you start stacking them on top of each other.
To reduce cake waste (unless you're like me, and want some cake waste so you can eat it), you can invest in some Bake Even Strips that Wilton makes. You just dampen them and wrap 'em around the cake pans before they go into the oven. Of course, if you have some old dish towels around and, if they are long enough, you can make some homemade strips by cutting, folding, dampening and wrapping them around the cake pans.
After the cakes have cooled, they can be leveled. Professional bakers use a bread knife and just go for it. Lazy, yet smart, bakers (such as myself) use a leveling tool. Again, Wilton makes a couple models and I have one pictured in the background of one of the pictures above. Once your cakes are leveled, you can place them on your board (or plate or cake stand with some wax paper underneath for easy clean up) and begin icing.
I like to plop lots of icing onto the cake layers and spread it over the sides. That of course is if my filling is the same as the outside icing. If they are different, you'll want to put some of your buttercream (or whatever you're icing the outside of the cake with) into a piping bag with a #12 tip and pipe around the edge of the cake and then spread your filling. But, as I was saying, if the filling and the icing are the same, let it spill over the edges.

Icing the sides of a cake can be tricky. This is where the consistency of your icing really matters. If it's too stiff or to still too chilly, then it won't spread easily. At the same time, I've tried icing a cake with a chocolate ganache that wasn't chilly enough and that was another big mess. Still, there is a little bit of technique that's involved and that comes with practice.
To start, just put a big glob of icing on the tip of your icing knife (is it called a knife? I can't remember what it's really called right now) and with slight back and forth movements (it's all in the wrist) just nudge the icing around. It's easier to start at the top where your icing is already spilling over the edges because then it will stick and hold to your cake more firmly than if you are to start at the bottom. As you add more icing it become easier to push around.
You'll also want to make sure that you build a crown around the top of cake as you ice around it. This way, when you're done you can take the edge of your knife and push the crowned icing toward the middle to get a nice smooth finish. Some bakers will even use a putty knife (you can get these at any hardware store) to run along the side of the cake to make the sides perfectly smooth. I have yet to try this technique, but I think I will soon.
I used the extra icing to pipe a shell type border with a #10 round tip.


No comments:
Post a Comment