Tuesday, March 31, 2009

Royal Icing 101


Let's talk Royal Icing. I like making ALL of my flowers (and any other make ahead decorations, for that matter) from royal icing. I like working with the stuff. I like how it's consistently cooperative. I like that I can make things ahead of time, let them dry, and place rock hard candies on a cake. And I like that if I have extras, I can keep them for up to a year.

However, I do not like eating royal icing unless it's on gingerbread cookies. Royal icing and gingerbread is a delicious combination. But at the same time, when it comes to flower making, I could make flowers from buttercream - except that I'm equally turned off by eating a flower made of all-shortening buttercream (ick!). And I always remind myself that some people really like royal icing flowers (some say they taste like candy). So with that in mind, if given the choice, I like to make decorations (especially flowers) with royal icing.


This post is a little biased toward flower making since, as you can see, I made some roses from royal icing. But other than pictures and this rose making tutorial, I will stray from discussing roses and focus specifically on royal icing and how to use it. I would just like to quickly note that whatever you can make with buttercream, you can make with royal icing.

Tips for using Royal Icing:

1) The consistency of the icing is important. Getting the right consistency is not anything tricky or scientific. Want a stiffer consistency? Add more sugar. Want it to be thinner? Add water - but watch out! It doesn't take a lot of water to thin down royal icing.

2) Runny consistency icing can eventually become your best friend. To be sure that your royal icing is runny, but not too runny or not runny enough - when stirring in water, lift your icing spatula (or spoon if that's what your using) and let the icing fall off the end into the container. Watch and count how long it takes for the icing to melt back together and look perfectly smooth. This should take about 10 seconds. If it doesn't become perfectly smooth without you having to shake the container it's in, add a few more drops of water and test again. If it's too runny it can be hard to control, so be careful to add water just a little bit at a time.

3) The kind of food coloring you use can make or break your icing. Since royal icing is nothing but egg whites, sugar, water, and maybe some flavoring - you don't want to add anything into the mix that is oil or fat based. Those little food colorings that you get at the grocery stores: just step away. Use a glycerine based food coloring. Wilton has a full line and now they sell at Wal-mart for about 50 cents less than Michaels. There area also other brands that can be purchased at specialty cake stores. I haven't tried these yet, but I will eventually.

4) Adding a lot of coloring will thin down your icing. I learned this when making those beautiful red roses. I ended up using two of the 1 ounce sized jars of red coloring for half a batch of royal icing. Didn't even occur to me that, hey - this might thin down my icing. Needless to say, I had to add another 1/2 cup of sugar to get my icing back to stiff consistency.

5) Royal icing dries out quickly. When working with in a bowl, make sure to place a tight fitting lid over the top when you're not working with it. If piping, have a damp paper or dish towel to place the tip of the piping bag to keep the tip from drying. I also keep some toothpicks handy because even though I might be working with a bag of icing for 15 minutes straight doesn't mean that it might not clog up on me.


6) Flavor your royal icing! But make sure that whatever you put into it is not oil or fat based. I recommend anything that's alcohol based - like an extract for example. The recipe I will give you below calls for a little bit of lemon juice, but one of these days I'm going to remember to pick up some lemon extract and try that instead.

7) Make your royal icing in a very clean bowl with very clean attachments. When I took those cake decorating classes, the teacher warned us: DO NOT USE A BOWL THAT HAS ANY BUTTERCREAM RESIDUE! Basically, make sure it's really, really clean. She warned us that any little bit of fat would ruin our royal icing. I heeded her command and to this day I could not tell you what happens if a little bit of oil or fat mingles with royal icing.

8) Keep your left over decorations. In fact, make sure to use all of your royal when you make it. Either make extras to keep and then store in an air tight container in a cool, dry place. Or eat the extras. I'm about to tattle on myself and admit that I don't always use the extra royal icing. I have a lot of extra red that I'm going to make additional flowers from, but if I have extra white, I'll usually store that (it'll keep in the cabinet for a few weeks).

9) Want to give your flowers "life"? Then use flower formers. Again, mine are Wilton gadgets that they sell to make money, but I have them so I use them. The smaller the flower, the smaller the former I use. For the roses pictured, I used a medium sized former. I have also seen flowers formed in small paint trays and empty egg containers. So there's no reason why you should feel limited.

10) Royal icing is great on cookies! Remember above when I mentioned I like it on Gingerbread? It also works well on sugar and shortbread cookies. To ice with it, use a medium consistency of icing and pipe (with a #3 tip is what I typically use) the borders of your decorations. Let dry (doesn't take long, maybe half an hour at the most). Then fill in with runny consistency and let dry (this takes a little bit longer, I'd say 5 to 6 hours to make sure it's rock hard). The end result: the cutest (and most delicious) cookies ever!

Royal Icing
recipe from Pretty Party Cakes by Peggy Porschen
recipe makes about 2 1/2 pounds
Note: Whenever I make royal icing, I usually halve this recipe because it always seems like a little bit of this stuff goes a long way.

2 tablespoons eggwhite powder
2 1/4 pounds confectioners' sugar, sifted
1 tablespoon lemon juice
2/3 cup water

1) Mix the eggwhite powder with 2/3 cup of water and pass through a strainer to get rid of any lumps.

2) Place the sugar in the clean bowl of an electric mixer, add about three quarters of the eggwhite mixture and the lemon juice, and start mixing on low speed.

3) Once the sugar and the eggwhite mixture is well combined, check the consistency. If the sides of bowl still look dry and crumbly, add some more eggwhite mixture until the icing looks almost smooth, but not wet.

4) Keep mixing for about 4 to 5 minutes, until it reaches stiff-peak consistency.

5) Spoon into a plastic container, cover with a clean damp cloth and the lid; store at room temperature.

The Lazy Celeste Method:
1) Put all of the ingredients (yes, even all of the water) into the bowl and beat on medium speed for 5 to 7 minutes until nice and fluffy. This usually yields a stiff consistency icing for me.

2) Same storage instructions as No. 5 above except that when I keep it in a plastic container, I nix the damp cloth.


Sunday, March 29, 2009

Picnic Perfect Cupcakes


Picnics and cupcakes go together like...Husband and I (or birds and feathers if that makes more sense for you). And since we were going to a picnic, I decided to bring cupcakes.

I figured that a light vanilla cupcake would be the best cake treat for an outside meal, and I wanted to make cream cheese icing (who doesn't like cream cheese icing?) but decided to switch it up by incorporating some left over chocolate ganache, and then if that wasn't chocolately enough, some cocoa powder too.


The vanilla cake recipe was wonderful. I've fallen in love with delish.com (MSN's food and entertainment website) because every recipe that I've tried from that site has been very good. Recently they had a list of 40 or so cake recipes, and that is where I found the recipe for this cake. Once again, Delish did not let me down.

Now for my cream cheese recipe, I'm about to share a family secret. Actually, I don't know if it is a family secret. It's the icing from a carrot cake recipe (yes, I'll make one for you eventually) and I always get a lot of compliments when I make any cake with that stuff.


Look at them...aren't they just good enough to eat? Oh wait, someone has already started!

Basic Vanilla Cake
from Country Living
This recipe makes one 8-inch round cake. For my cupcakes, I doubled the recipe, filled the liners a little over half full and it yielded 32 cupcakes.

1 1/2 cups sifted cake flour*
1 1/2 teaspoons baking powder
1/4 teaspoon salt
1/2 cup (1 stick) unsalted butter, softened
1 cup sugar
2 large eggs, room temperature
1/2 teaspoon vanilla extract
1/2 cup whole milk**

1) Heat the oven to 400 degrees F. Lightly coat an 8-inch cake pan with butter and dust with all-purpose flour. Sift the flour, baking powder, and salt into a bowl (you can do this in your KitchenAid bowl).

2) Beat in the butter one heaping 1/4 teaspoon full at a time, using an electric mixer set on low speed, until the mixture resembles coarse sand. (I didn't have enough patience for this step, I just cut up the butter and stuck it in the bowl and pulsed my KitchenAid.) Beat in the sugar a tablespoon at a time (I put it in all at once) until the mixture resembles fine damp sand. Beat in the eggs, one at a time. Add the vanilla and milk, and beat on medium-high, just until blended. Do not overbeat.

3) Pour into the prepared pan and bake until a wooden skewer (read: toothpick) inserted in the center comes out clean - 30 to 35 minues (for cupcakes, bake about 17 minutes). Cool in the cake pan and on a wire rack for about 5 minutes.

4) Un-mold and cool completely.

Chocolate Cream Cheese Icing

1/4 cup chocolate ganache (read: left over from the last time you made ganache, otherwise, just melt some milk chocolate)
2 (8 oz) blocks of cream cheese
1/2 cup (1 stick) unsalted butter
1 teaspoon vanilla
1 pound confectioner's sugar (feel free to add 1/4 - 1/2 pound extrafor a stiffer consistency)
1/2 cup unsweetened cocoa

1) Cream butter, cream cheese, and vanilla in a stand mixer (or with a hand mixer) on medium-low speed until smooth.

2) Incrementally add the sugar and cocoa. Beat until smooth. Use immediately. Can be stored in an air tight container and stored in the refrigerator. I don't know how long it would keep. I'd say to be safe, maybe a week to a week and a half.

*Don't have cake flour? Neither do I. In fact, it's the only flour I do not keep on hand because it's cheaper to make. In a 1 cup dry measure, dump in 2 tablespoons of corn starch, then fill the rest of the cup with all-purpose flour.

**I don't know how it happened, but we had NO MILK. So it was between light plain soy milk, or half and half. I went with the half and half. The cake was still delicious. In fact, it might have been more delicious than usual because of the half and half.

Saturday, March 28, 2009

Chocolate Cake, Last Minute


On Friday, Husband and I made last minute plans to have dinner with his mother and aunt. His aunt had been having a week-long craving for chocolate cake with chocolate icing...so, I think you know where this is going.

Since I only had about an hour and half to make this cake, I cheated. See, when I first started making cakes I would use a cake mix since I was more concerned about practicing my decorating techniques. However, I'm learning that a pretty cake and a will-make-you-wake-up-in-the-middle-of-the-night-in-a-cold-sweat-craving-cake cake is what I ultimately wanted. So, by using a mix, I cheated.

If you must know what mix I used, I used a Betty Crocker mix. The Triple Chocolate Cake mix to be exact. The cake does turn out to be pretty good, and of the chocolate cake mixes that I've tried, I think that one is the best.


Honestly, though - an hour and half really isn't enough time to make a cake. I had to level these puppies and stick them in the fridge to get their temperature down enough so I felt okay icing them. And then for icing, I melted some chocolate and the half hour that I gave it to cool wasn't enough. That's why the icing looks so speckled - I wasn't able to get the temperature of the chocolate down low enough before it hit the whipped cream (yes, I said whipped cream).

So to ice the cake I knew that I wanted something light. Nothing in the realm of a ganache (too rich) or a buttercream (to heavy and buttery). So I made a chocolate whipped cream. Just look at it...If it makes you wake up in the middle of the night in a cold sweat craving cake...well, you know where to find me.


Chocolate Whipped Cream
made up by yours truly. If you want to fill and ice an 8- or 9-inch cake, double the recipe below.

4 oz semi sweet chocolate
1 1/4 cups whipping cream
1 tablespoon confectioner's sugar
1/2 teaspoon vanilla extract

1) Melt the chocolate in a heat proof bowl over a small pot of boiling water (aka a double boiler). When chocolate is just melted, let cool to room temperature, but do not allow to become firm again.

2) After chocolate has cooled, whip the whipping cream, sugar, and vanilla to a stiff consistency (but not buttery).

3) Fold in the melted chocolate.

Note: Since my chocolate was still a tad too warm, it wasn't incorporating smoothly into the whipped cream and I stuck it back onto the KitchenAid and whipped it. Which is also an option for you - if you so desire. However, I'm convinced somewhere in my soul that folding the chocolate into the whipped cream is the most desired technique.

Sunday, March 22, 2009

Banana Cake topped with Chocolate and Caramel Part II


So...the Banana cake needs a new name. I had some difficulties with the caramel part of this cake. The first time I tried to make the caramel (by boiling sugar and water until it turns a dark amber color) it burned. I almost thought that I might have ruined a pot. So I tried again, and this time I made sure to watch it before it burned, and I was successful. I pulled it off the heat and began to incorporate the heavy whipping cream. It just turned into a gloopy mess. I shouldn't have posted a picture. But I did. I figure that if I had to see it, then so should you.


The ganache part of the cake was a piece of cake (pun intended...if there is one). It was so smooth and delicious one of the cake victims asked if it was pudding. Which made me wonder, what is in pudding?

As for the decorating of the cake, I had hopes for something much more glorious and spectacular than what I actually pulled off. I was up until 1am working on this cake (my own fault - I didn't manage my time as well as I could have this weekend). Consequently, the amount of SMBC (short for Swiss Meringue Buttercream) that I made was not enough to do the striping on the cake that I wanted to do. However, it was probably for the best. The cake turned out really cute and the stripping might have turned out to be just a bit too much.


But just in case, I've done the math for an SMBC ratio that would yield plenty of extra icing for decorations on an 8 inch cake. As for the assembly of this cake, I torted both cakes (meaning that I baked two cakes, and I sliced each in half that gave me a four layer cake), used a #12 round tip to pipe some buttercream as a dam for the chocolate ganache (this was for each layer), crumb coated, chilled in the fridge for about half an hour, and then coated in the final layer of buttercream. I cannot speak more highly of a crumb coat. Crumb coats do not have to be perfect, but it does help to have good edges and to keep the coat as close the cake as possible. Ideally, you'll still want to see the cake and fill in any gaps or overhangs.

Chocolate Ganache
ganache recipe from the Hershey's Lavish Chocolate Cake (which is actually a really good cake, I'll have to make one for you one of these days)

1 cup (1/2 pint) heavy cream (aka whipping cream)
1 1/2 cups Hershey's Special Dark Chocolate Chips or Hershey's Semi-Sweet Chocolate Chips (I used mostly milk chocolate chips which I think is why it tasted like pudding. If you wanted a really rich ganache, then consider using a higher quality chocolate)

1) Heat whipping cream in heavy saucepan over low heat until warm (DO NOT BOIL). The trick to this recipe is to make sure that the cream is warm enough. If it's not, then the chocolate won't melt completely, and even though it is nice and smooth when you put it into the fridge, the ganache won't stay nice and smooth. This happened to me the very first time I made this stuff, and then I found out that I didn't let my cream get warm enough.

2) Add the chocolate chips; stir constantly just until chips are melted and mixture is smooth. Do not let mixture come to a boil.

3) Transfer mixture to a medium bowl; refrigerate until of spreading consistency, about 1 1/2 hours. I kept mine in the fridge for less time than that, which was perfect because it was cooled, but I didn't really have to spread anything. I just poured it on the cake and nudged into any empty spaces.

Swiss Meringue Buttercream (for icing - maybe also filling - an 8-inch cake, with plenty left over for lots of buttercream decorations)

1 1/2 cups sugar
6 large egg whites
39 tablespoons of butter, softened (4 sticks plus 7 tablespoons)
1 1/2 teaspoons vanilla extract

For the method, click here.

For the Banana Cake Recipe, click here.

Wednesday, March 18, 2009

Sour Cream-Chocolate Cake with Vanilla Swiss Meringue Buttercream


Alas, I'm so ashamed of myself. I made a HUGE mistake on this cake. It was already bad enough that I couldn't get the pink to turn out magenta (I was afraid my buttercream would turn into a soup-like consistency). But after - AFTER - I had iced the cake (and we're not talking a crumb coat here) I realized that I had forgotten to add the vanilla. So I can't even say that this cake has vanilla buttercream.

I want to run and hide.


Not to mention that I'm really hating the digital camera. I need to upgrade to something that actually takes decent pictures of food.

ugh...I'm just regretting this cake! Fortunately the cake part of this...thing does happen to be totally and completely delicious. It's extremely moist, wonderfully chocolately, and very light. As husband would put it, "nom nom nom!" But I do need to provide a crumbly cake warning. These cakes were very delicate. When I was wrapping them so I could firm them up in the fridge, I thought they were going to split in two. Overall, I wouldn't recommend making this cake any bigger than what the recipe specifies, I would go with something sturdier if you're going to make a sheet cake. But then again, it's so good I wouldn't blame anybody for trying.


And yes, can you believe that this buttered chocolate cake is for someone's birthday? In my defense, it was a last minute request, so I just got a little flustered and hurried.... Okay, excuses are lame. I'm never going to let myself live this down.

Sour Cream-Chocolate Cake
This recipe is the chocolate cake part of Sour Cream-Chocolate Cake with Peanut Butter Frosting and Chocolate-Peanut Butter Glaze from "Sky High: Irresistable Triple-Layer Cakes"

Makes an 8-inch triple-layer cake, but I stuffed it into two 8-inch cake pans and baked it until it was done (maybe 40 to 45 minutes)

2 cups all-purpose flour
2 1/2 cups sugar
3/4 cup unsweetened cocoa powder, preferably Dutch process
2 teaspoons baking soda
1 teaspoon salt
1 cup neutral vegetable oil, such as canola, soybean or vegetable blend
1 cup sour cream
1 1/2 cups water
2 tablespoons distilled white vinegar
1 teaspoon vanilla extract
2 eggs

1) Preheat the oven to 350 degrees F. Butter the bottoms and side of three 8-inch round cakepans. Line the bottom of each pan with a round of parchment or waxed paper and butter the paper. I recommend the parchment paper simply because I've never had a good experience with waxed paper in the oven...or maybe I'm just doing something wrong.

2) Sift the flour, sugar, cocoa powder, baking soda, and salt into a large bowl. Whisk to combine them well. Add the oil and sour cream and whisk to blend. Gradually beat in the water. Blend in the vinegar and vanilla. Whisk in the eggs and beat until well blended. Scrape down the sides of the bowl and be sure the batter is well mixed. Divide among the prepared cake pans.

3) Bake for 30 to 35 minutes, or until a cake tester or wooden toothpick inserted in the center comes out almost clean. Let cool the cakes in thier pans for about 20 minutes. Invert onto wire racks, carefully peel off the paper liners, and let cool completely.

For the Vanilla Swiss Meringue Buttercream, you can find the recipe and the method on this posting:
here.

Icing with no vanilla...I'm gong to put this down on my Lessons Learned list.

Sunday, March 15, 2009

Banana Cake topped with Chocolate and Caramel Part I


Well, here's the first project since I've started this blog. I'm very excited to share the details. This cake will be a banana cake with chocolate ganache filling and caramel Swiss meringue buttercream. Sorry, the title of this post is sort of deceiving. I need to come up with a better name for this cake.

Today I did some prep work for the final decoration of this cake. The cakes themselves are currently in the freezer - double wrapped and shoved into plastic ziplic bags. I made them about two weeks ago. I've provided the recipe at the end of this post.


My plans for this cake include a yellow cake board, off white, yellow, and golden yellow vertical strips coming down the side of the cake with yellow and golden yellow flowers around the top. It's going to be very cute.

To make the yellow cake board, I took some Wilton Fondant (because it's cheap and even though it's icky tasting, nobody will be eating the fondant on the cake board) and colored it yellow. Then I rolled it out to something a little bit thinner than a quarter of an inch. Next, I took my cake board and covered the edge of the board with piping gel (to help the fondant stick). The rest is easy: place board on fondant, fold fondant over the edge, then use an icing spatula (or a butter knife) and cut the excess off. I recommend doing this at least a day in advance of decorating your cake because you'll want to give the board enough time to dry.


To make the flowers, just roll a bit of fondant out really thin, maybe around 1/8 or 1/16. After cutting out the flowers, I placed it on a thin flower mat and used a candy maker with a ball on the end and thinned out the edges. Moving it over to a thicker sponge, I pressed the center to give it shape and then moved it to a flower former. You could use anything: a paper towel roll cut in half, or an old egg carton. I just happen to have some gadget made specifically for the purpose of giving flowers a curved shape.


Banana Cake
adapted from Paula Deen's 1-2-3-4 cake recipe

1 cup (2 sticks) butter, softened
1 cup milk
2 cups sugar
3 cups self-rising flour*
4 eggs
1 teaspoon vanilla extract
1 teaspoon cinnamon
2 cups very ripe bananas, smashed

1) Preheat oven to 350 degrees. Grease and flour cake pans.

2) Using a mixer, cream butter until fluffy. Add sugar and continue to cream for 6 - 8 minutes.

3) Add eggs 1 at a time, beating well after each addition.

4) Add flour and milk alternately to creamed mixture, begin and end with flour.

5) Add vanilla, cinnamon, and bananas and beat until just mixed.

6) Divide evenly among cake pans. Make sure it is level by picking up the pans 2 - 3 inches above the counter and then dropping.

7) Bake 25 - 30 minutes until tester comes out clean.

*If you don't have or don't want to buy self-rising flour, then add to each cup of flour 1 1/2 teaspoons baking soda and 1/2 teaspoon salt.

Thursday, March 12, 2009

Orlando MS Bike Ride 2009


So...what does a bike ride have to do with cakes? No much really. Unless you're looking to win a free cake.

Husband and I are raising money for the MS Bike Ride in May. It actually feels like a tall order because in order for us to even be able to participate, we have to raise a minimum of $250...each. So to help us raise this money, we've decided to sell raffle tickets for a cake. Oh, yes...a cake. Something delicious and sweet and pretty.

PLUS - it gives me a reason to make a cake (or cakes since we're giving away three) because I find more satisfaction in making a cake when I have a reason to make it (otherwise it's just a big waste of perfect deliciousness).

Speaking of reasons to make a cake...I will be making a birthday cake for the girls at church. It's a monthly birthday thing we do, and I've volunteered. It'll be next week, but I do have quite a bit of preparation to do for this cake (it's going to be the cutest birthday cake EVER) and I will be sure to provide lots of updates since this is the my first cake since I've started this blog.

Tuesday, March 10, 2009

Cake Stacking 101


A level, stacked cake. It's nirvana. At least the first time for me was. And it's actually easier to do than I originally thought. The hard part is making sure that your individual cakes are level, and that's easy enough to do (I always use a cake leveler).


First thing you need to do is make your cake boards. They should be exactly the size of the cake you plan to put on it (I know...that really should go without saying). The next thing that is important to have is FOOD SAFE foil. Wilton makes this stuff, they call it Fancifoil. I once bought some foil at a cake store that was red and pretty...it was not food safe. When I was icing the cake, the red stuff was coming off. Not good. If you are going to put food on it, just make sure the words "food safe" are on the label. If not, just keep looking....

Next, cover the board. It's pretty easy. Slap some glue on the edges (a glue stick works the best), fold the foil over the edge, and trim the excess. If the bottom of the board is not going to be touching any food, then you can stop there. If the bottom is going to be touching food, then you might want to cut some foil to cover the bottom. There's a picture below to better illustrate.


So, now you have your boards. You build your cakes on your boards (level, fill, ice, decorate) and then gather the next set of tools: food safe dowl rods, a dedicated pencil sharpener (by dedicated I mean that you don't use it to sharpen pencils), and something to cut the dowl rods with. Lucky for me, Husband owns a dremel tool. A word on food safe dowl rods: the ones at the home improvement store are usually treated with a weather proofing chemical, buy your dowls from the cake section at your local craft store or at a cake supply shop. There is also the option of using straws. I've yet to try that. I get too nervous with my cakes to trust an easily bendable plastic straw....

All dowls, when cut, should be the same length. How do you determine the length? Look at your cake and find the side that is the highest, place a dowl into the cake, mark the dowl and then cut all of your dowls. For most of the cakes that I make, I generally only use four dowls for each supporting tier, the top tier never needs to be dowled unless you plan to travel with it fully assembled. If that is the case, then you will take one long dowl, sharpen the bottom, and then insert the dowl into the cake and use a small rubber mallot (or a hammer if that's all you have) to help you get that dowl through all of the cakes and cake boards. Again, something I've never done because I prefer to assemble my cakes on sight so I don't have to worry about covering for a dowl hole in the top most cake tier.


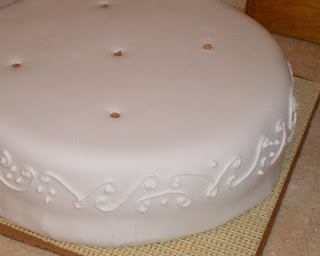
This wedding cake (for my friend Sarah R.) is chocolate, filled and iced with American buttercream, and covered in fondant. The scroll work is done with royal icing.